How to mount and stretch your canvas on a frame for your painting by numbers
Before you start painting, putitng your canvas together correctly is vital, to get a final result without defects. In this article we'll show you how.
Why use a frame?
A frame is a wooden or metal structure used to stretch an artistic canvas before painting it. Mounting a canvas on a frame offers several advantages:
- It makes it possible to stretch the canvas evenly, avoiding unwanted folds or bumps.
- It makes it easier to handle the canvas during painting, as it will remain stable and won't deform.
- It can be hung directly on the wall without a picture frame, so you can present your painting in a professional and modern way
- It allows you to paint on a tense and solid surface, offering a better support for painting and guaranteeing the long-term durability of your work.
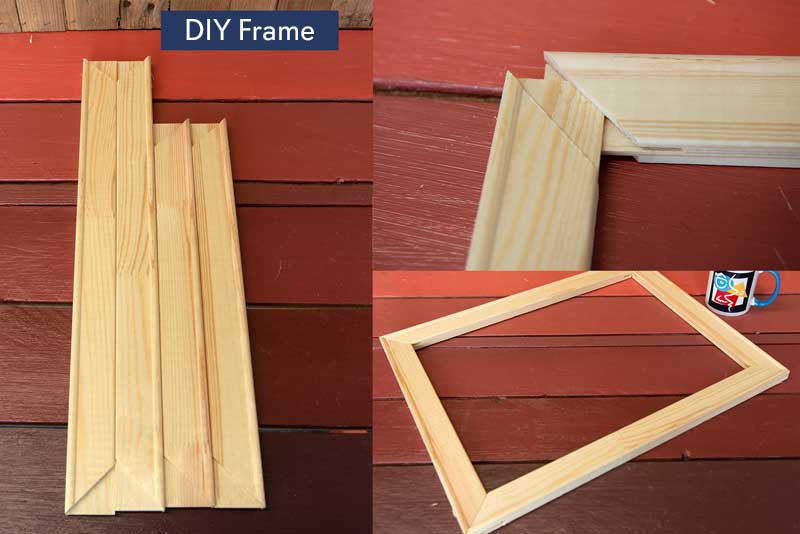
The frames that you can order with our paint by numbers are exclusively made of wood, composed of four rods that fit into each other. They're really easy to assemble.
There are 7 steps to mount and stretch your canvas on a frame:
Step 1: Prepare your equipment
Make sure you have all the necessary equipment on hand.
You'll need:
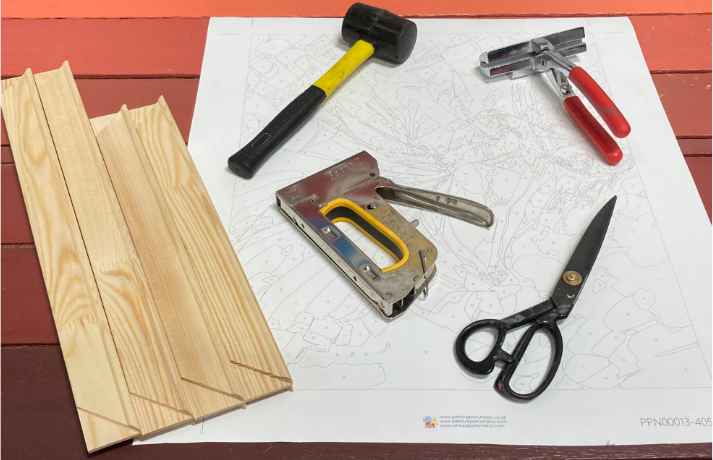
- Your canvas
- A wooden frame of the right size for your canvas
- Nails, pushpins or staples to fix the canvas to the frame
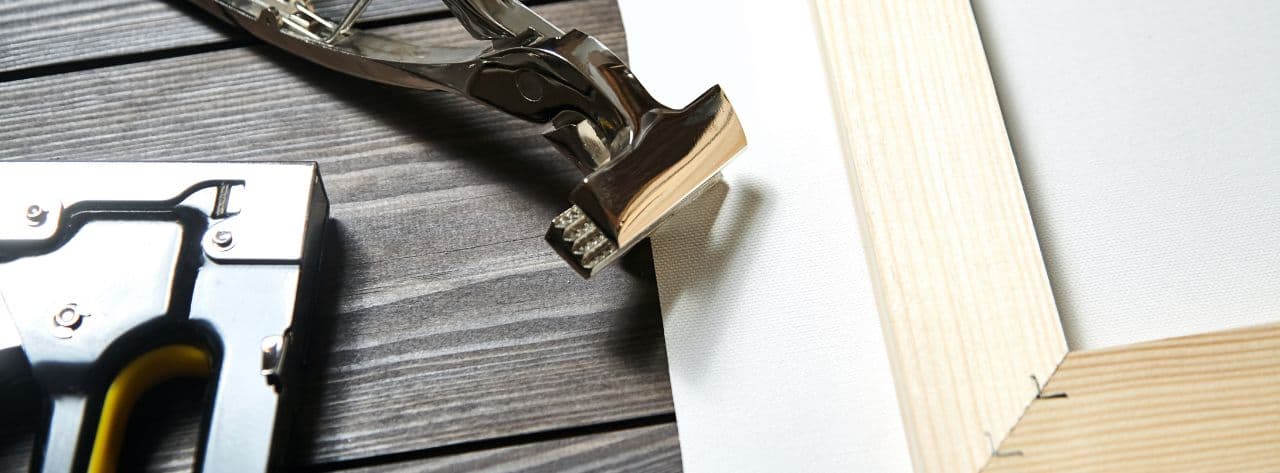
- A staple gun to fix the canvas (and canvas pliers if you want a professional result)
- A hammer
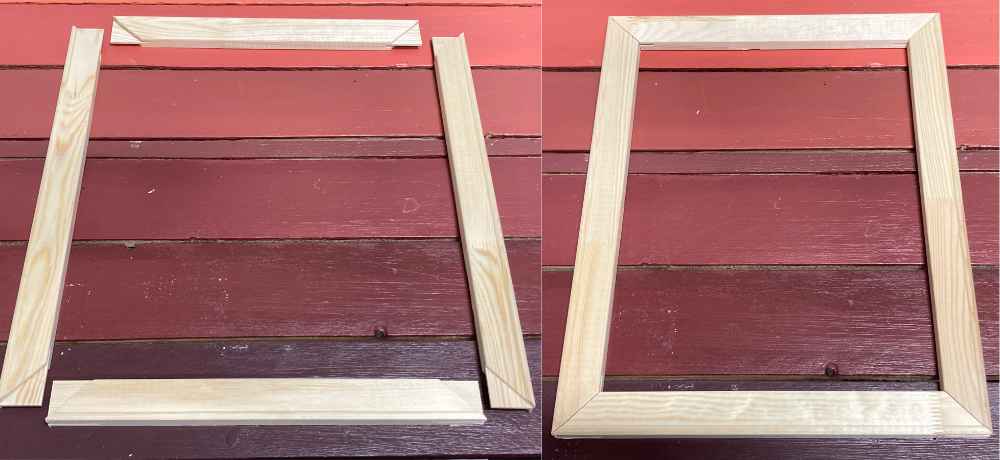
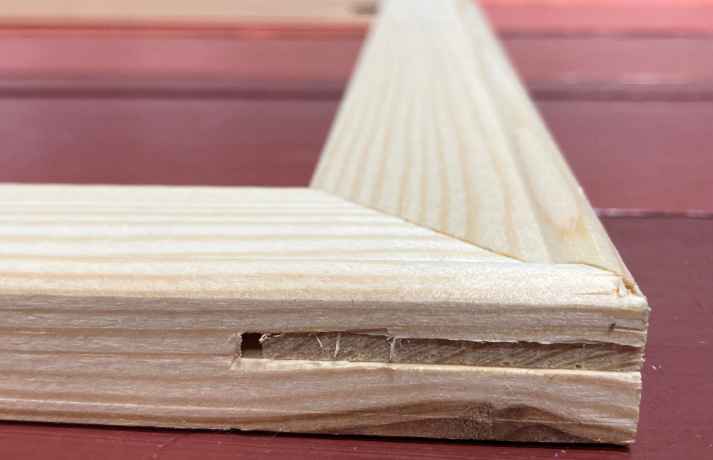
Step 2: Assemble the frame
Assemble the rods to form the frame. Make sure the corners are perfectly aligned to get a solid and stable base. The four wooden rods fit into each other no need for nails, screws or tools!
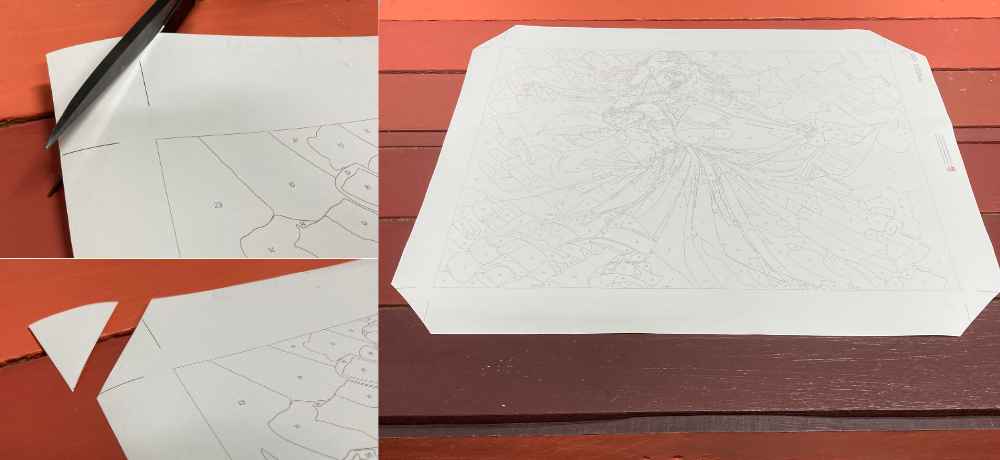
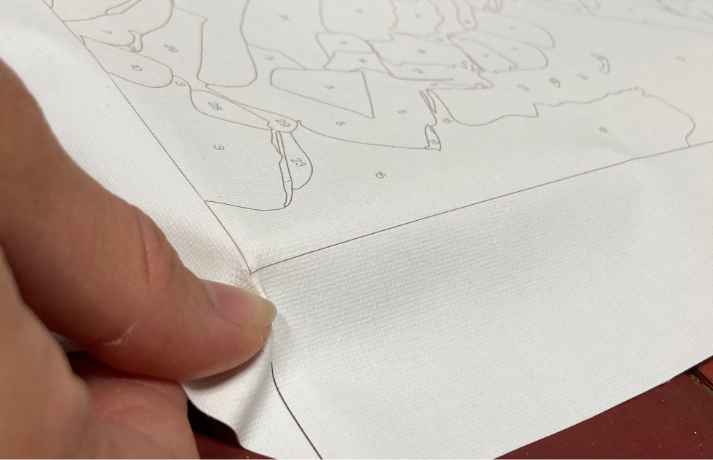
Step 3: Prepare the canvas
Cut the four corners, imagining an isosceles triangle whose 2 equal sides are 2cm (see image). This little trick will allow you to get clean and professional corners.
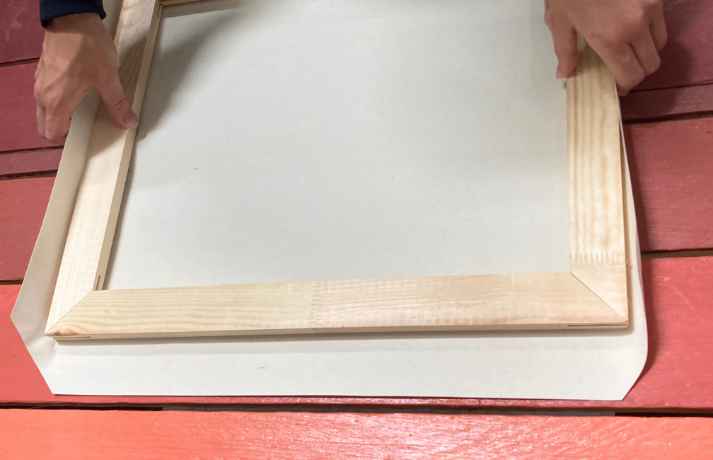
Step 4: Position the frame
Place the frame on a table, making sure that the side with the rounded edges is on top. The back of the frame, which is flat, must be in contact with the table to ensure a flat surface.
Step 5: Position the canvas
Place the canvas on the frame with the pre-printed part visible on top (with the numbers in front of you). Align the corners of the pre-printed rectangle with the corners of the frame.
Step 6: Turn the frame and canvas over
Turn the canvas and frame over, taking care to them aligned.
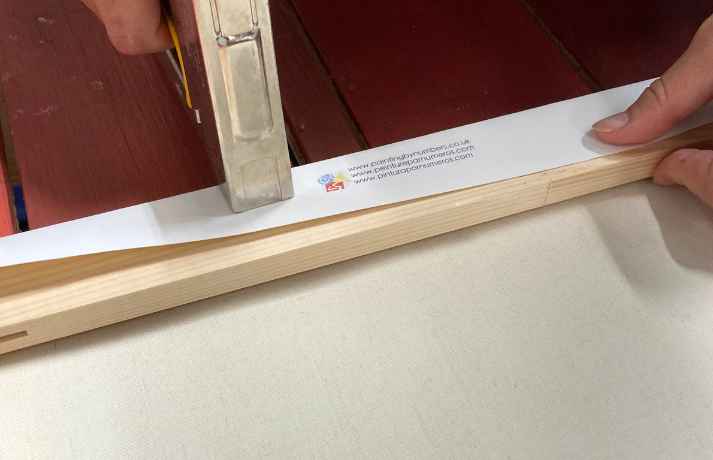
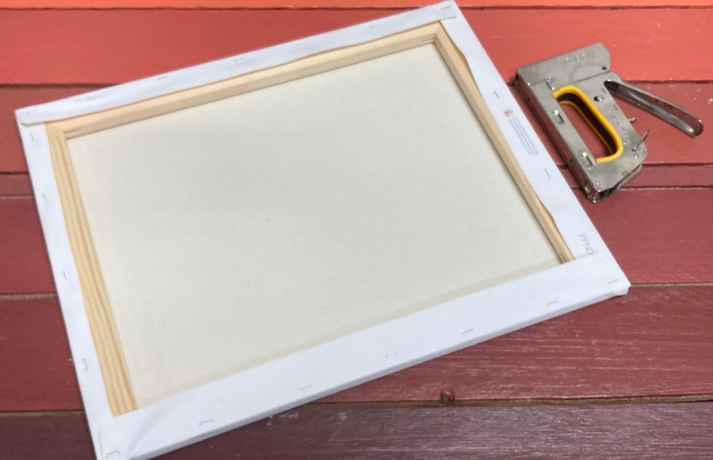
Step 7: Fix in place
Start with one of the two shorter sides or if your canvas is square any side!
There are two ways to attach the canvas to the frame:
- Option 1 Stretch the canvas by hand: Stretch the canvas with your fingers, taking care not to misalign it, and staple the canvas on one of the small sides. Start close to one corner and continue to position your staples at regular intervals until you reach the second corner. There are no real differences between using pushpins or staples. However, if you choose pushpins, you may need a hammer if you're unable to push the pushpins by hand.
- Option 2 Use canvas pliers: Canvas pliers will make it easy! The canvas clip allows you to hold the canvas firmly while you fix your staples or pushpins in. This simple and effective little tool ensures you avoid slight movements of the canvas and frame that can occur when doing stretching by hand. Pinch the canvas to the frame (in the middle of the frame) and staple from one corner to the next.
Once the first side is finished, repeat on the second small side, then each of the remaining sides.
It's done! Once your canvas is well stretched and stapled, you can turn the frame so that you have the numbered part of the canvas in front of you, and start painting by numbers!
Follow these steps carefully and get creative so you can have a framed canvas worthy of a great master! What are you waiting for? Order your next work without further delay with your DIY frame, and mount your canvas like a pro!